Wandering around the Kindred Spirit blogs is always inspirational, as recent doings attest.
I’ve especially enjoyed the return of Deb’s Artisun blog, on which she recently posted a delightful little pillow called a biscornu.Since I was relatively uninspired by the James Madison University pillow that I made for granddaughter Logan, I took it apart and restitched it biscornu-style …
and was pleasantly surprised at how it was transformed into a pouf almost 8” high …
Much better!
I’ve also been following the back-and-forth between Nancy and Grace relating to bands of color during which Nancy posted a pin on Pinterest that reminded me of the walking sticks Don painted using leftover paint some time back …
Serendipitously, the picture of our front porch, where the walking sticks live, also shows a NO TO WAR poster from Barry Smith at Rustnstuff.
I finished another Glennis moon patch, edged with two strands of Deb Lacativa’s magically variegated floss …
Which is all by way of saying “thanks!” to all the bloggers who put so much time into contributing to their respective communities. I am grateful each and every day by what I see and read.
Weather news first … it’s not really that cold at 30 degrees in Central Texas, but a fine rain continues to fall, weighing the trees down with ice. Behind our house, the neighbor’s live oak has drooped another 2-3 feet since I took the first picture at dawn …
We did lose power for a couple of hours, but we are fortunate (?) to have a gas stove, so I was able to make hot coffee and grain cereal for breakfast.
Our daughter in south Austin has not (yet?) lost power, but she does have a lot of live oaks which are losing branches at an alarming rate …
And so it goes …
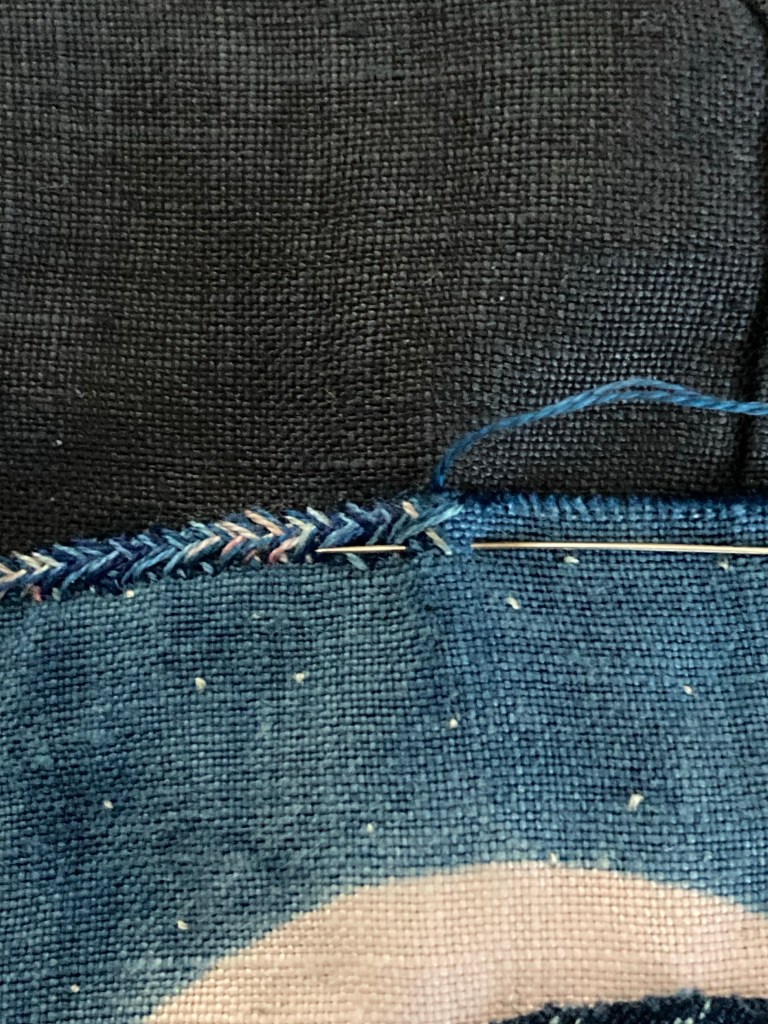
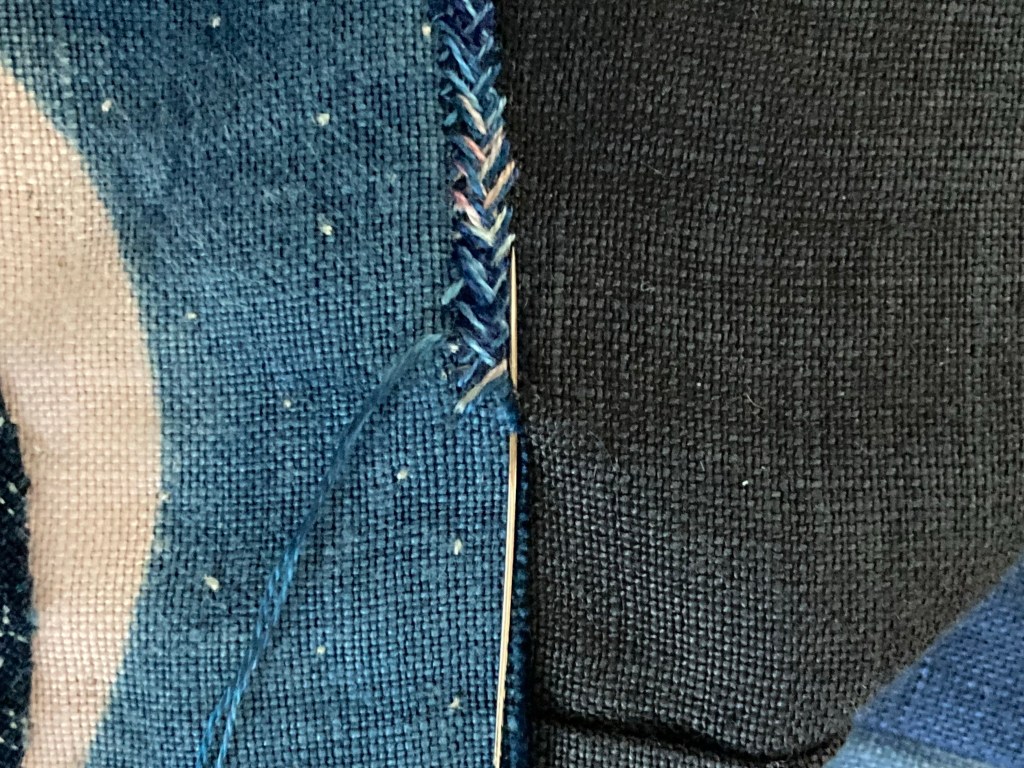
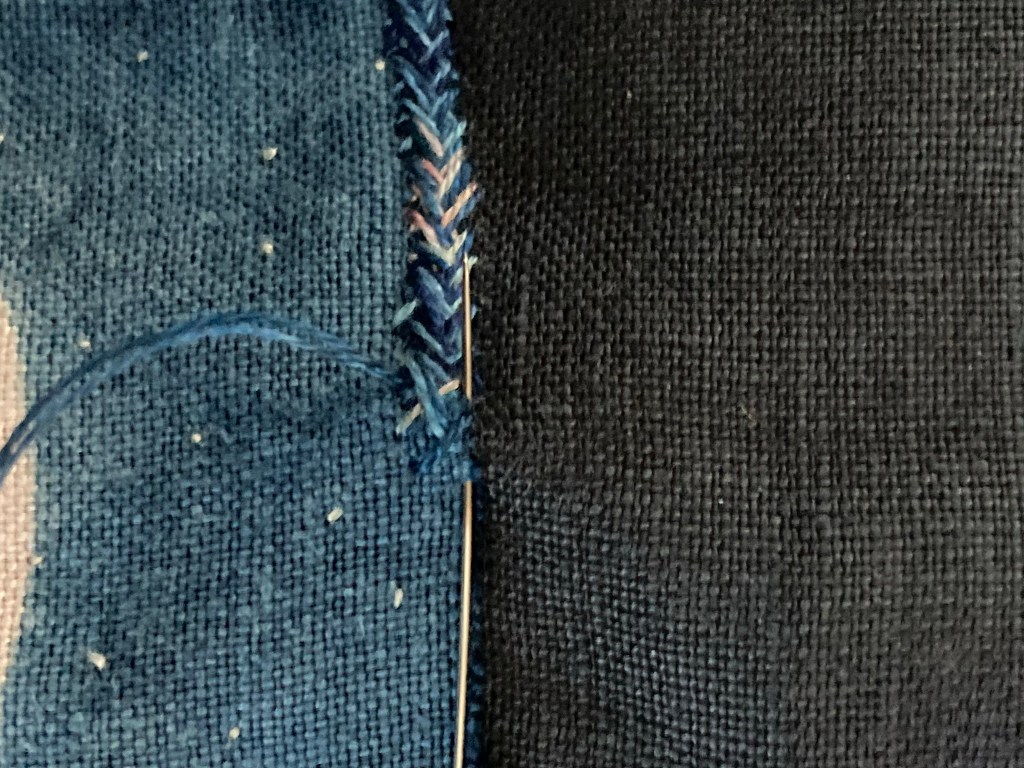
On a more positive note, I have encased the raw edges of three Glennis moons in close(d) herringbone, seen here front and back …
Two strands of variegated Simply Shaker floss worked in close(d) herringboneTwo strands of Deb Lacativa’s dyed floss in close(d) herringbone around the outer raw edges + Jude’s split backstitch outlining the moonOne strand of Valdani variegated #12 perle cotton worked in close(d) herringbone
Note that all the moon patches were first basted down with Jude’s glue stitch, which will remain in place as the tiny white stitches serve as visible “stars” on the front of the patches.
As you can see, there are also horizontal lines of paired stitches running through each of the other-side pictures shown above. Those stitches were formed by the combination stitch that I used to attach the long strips of black linen to the flannel sheet, as described here …
Four strips of black linen attached directly to the flannel backing log-cabin style
For the record, this is how I worked the Combination Stitch of one tiny backstitch combined with two running stitches …
where the needle comes up at 1, a tiny back stitch down at 2, followed by running stitches up at 3, down at 4, and up at 5 … all done in one motion.
The next pass of stitches continues up at 5, down at 6, up at 7, down at 8, and up at 9.
The result on the top side is a series of stitches that look like dash dot dash dot … on the back the stitches look like paired dashes.
The reason you do not actually see the stitches on top in the image above is that the strips of cloth were folded over on themselves after being attached to the flannel in order to create a bound edge … basically a form of log-cabin construction directly on the flannel backing cloth.
I used some other ways of attaching cloth to the flannel sheet, so stay tuned for more in the promised series …
Nancy asked for a little more detail on how I worked the close/d herringbone to bind raw edged patches. I looked online and the best I could find was this video on plain herringbone https://yout-ube/RZdDyjtkPdo … and this one that shows herringbone as a filling stitch https://yout-ube.com/watch?v=zkNGRgk7u0g&si=EnSIkaIECMiOmarE which appears at the 2 minute mark. But neither show exactly how I do it.
So I looked in one of my books and found this diagram …
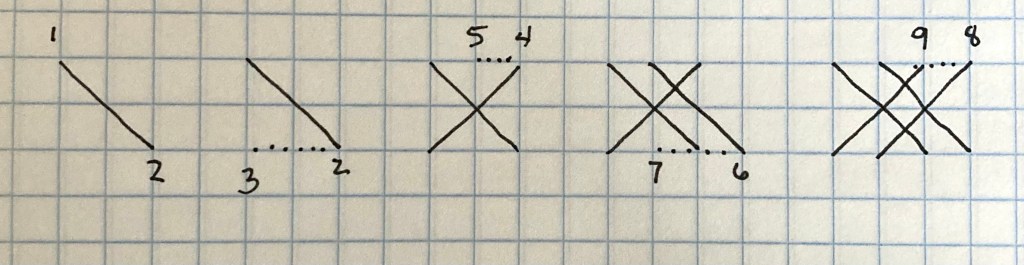
which was close, but not exactly it either. I like to make the stitches much closer together so that the raw edge is enclosed. So here’s my own stitch diagram, followed by pictures …
Start by making a simple cross stitch, where 1 is your needle coming up and 2 is the needle going down.
I don’t “stab stitch” and I don’t use a hoop … I just run the needle down at 2 and back up at 3 in one motion, like this …
Next I go down at 4 and come up at 5 …
Go down at 6 and come up at 7 …
Go down at 8 and come up at 9 …
and repeat repeat repeat …
What’s important to note is that I don’t do the stitches as precisely as they are diagrammed … I just go with the flow. The resulting line of stitches is very much like a backstitch, your needle moving from right to left while the stitches accumulate from left to right (with apologies to all the left-handers out there for whom everything is in reverse).
Unless, of course, I’m working vertically, which I sometimes do. In which case the needle is always pointing up while the stitches move down, sorta like this …
And yes, those are the same photos as before, just rotated 45 degrees to make the point that the stitching motion remains the same whether you work horizontally or vertically (I do both).
Phew … hope that helps. I do wish I had a set-up for doing video, which might have made things clearer, but I’m not ready for prime time 😉
On a lighter note, I had to laugh when I got an email from a local boutique showing the “latest” in denim fashion … looks like every pair of jeans I’ve owned for the past 50 years … with the exception of the holes in the knees, which I tend to patch, and the hems, which are usually just frayed at the heels …
Last for today, here’s an intriguing thing that I read about somewhere and then searched online …
It’s a subscription service (pricey at $33 a month) where you’re given a mechanized bin for discarding food waste (veggie and fruit trimmings, egg shells, food scraps, even chicken and fish bones). The device runs at night, dehydrating and crushing the food into a dry meal of sorts. There’s a charcoal filter to eliminate odors, which is recyclable and replaced periodically as part of the service. When the bin is full (every 3-4 weeks) you empty it into a resealable bag, box it up in a prepaid mailer, and give it to USPS to deliver to the mother ship. From there, the plan is to convert it to chicken feed … something they’re still “working on.”
You can read more about it here … and no, I’m not going to subscribe in advance, but for sure I’ll keep an eye out for news on how it works once it goes live.