Nancy asked for a little more detail on how I worked the close/d herringbone to bind raw edged patches. I looked online and the best I could find was this video on plain herringbone https://yout-ube/RZdDyjtkPdo … and this one that shows herringbone as a filling stitch https://yout-ube.com/watch?v=zkNGRgk7u0g&si=EnSIkaIECMiOmarE which appears at the 2 minute mark. But neither show exactly how I do it.
So I looked in one of my books and found this diagram …


which was close, but not exactly it either. I like to make the stitches much closer together so that the raw edge is enclosed. So here’s my own stitch diagram, followed by pictures …
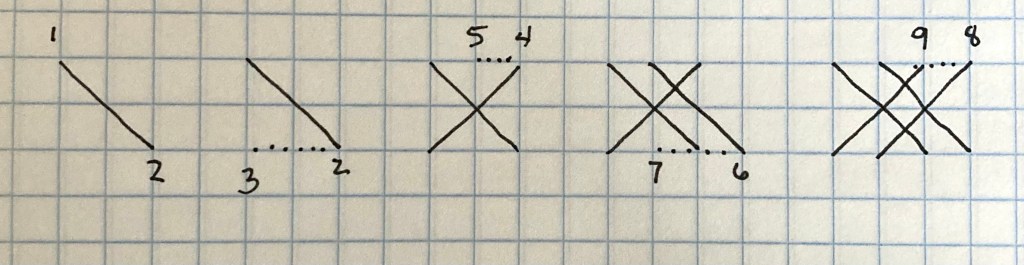
Start by making a simple cross stitch, where 1 is your needle coming up and 2 is the needle going down.
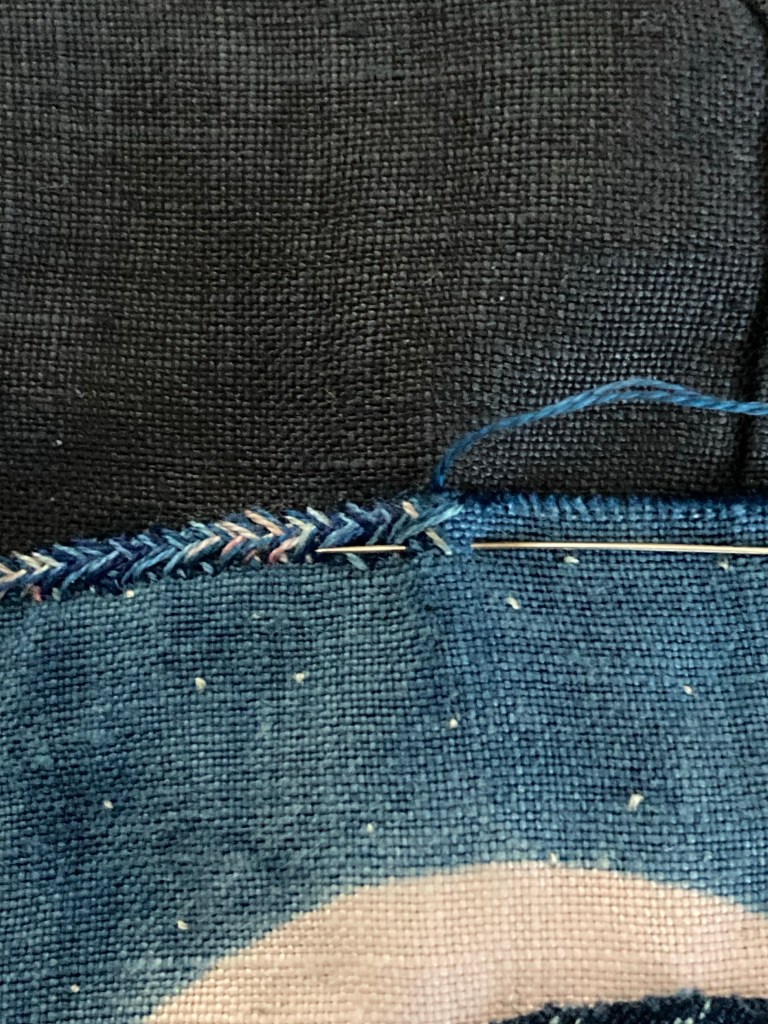
I don’t “stab stitch” and I don’t use a hoop … I just run the needle down at 2 and back up at 3 in one motion, like this …

Next I go down at 4 and come up at 5 …

Go down at 6 and come up at 7 …
Go down at 8 and come up at 9 …

and repeat repeat repeat …
What’s important to note is that I don’t do the stitches as precisely as they are diagrammed … I just go with the flow. The resulting line of stitches is very much like a backstitch, your needle moving from right to left while the stitches accumulate from left to right (with apologies to all the left-handers out there for whom everything is in reverse).
Unless, of course, I’m working vertically, which I sometimes do. In which case the needle is always pointing up while the stitches move down, sorta like this …


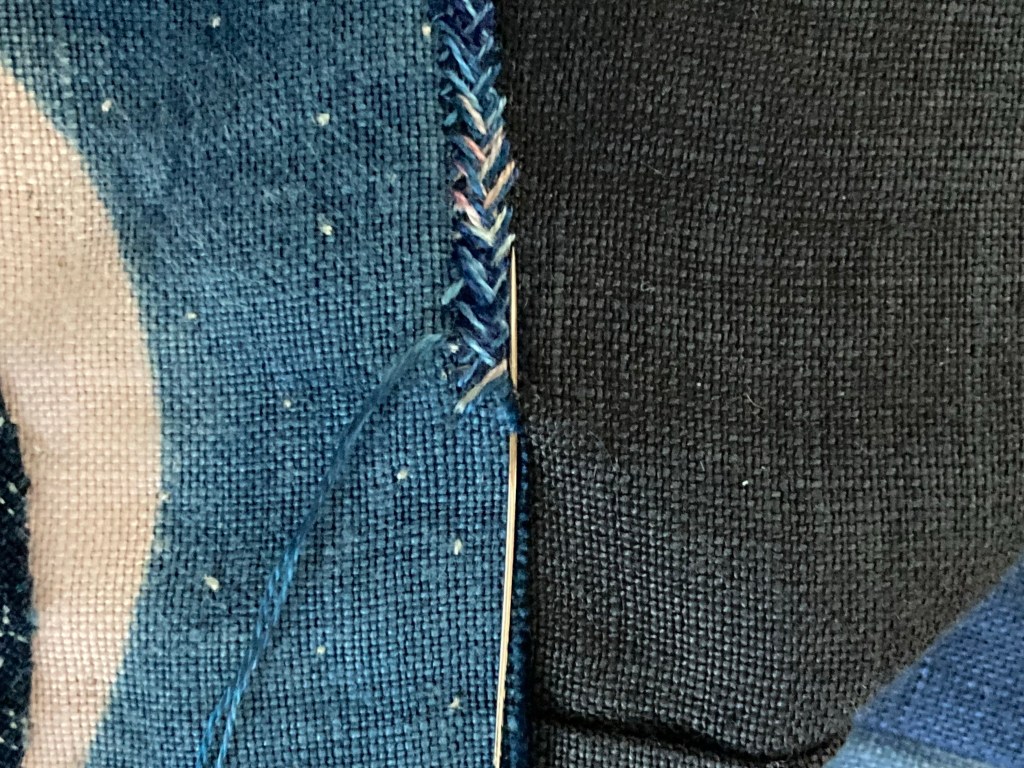

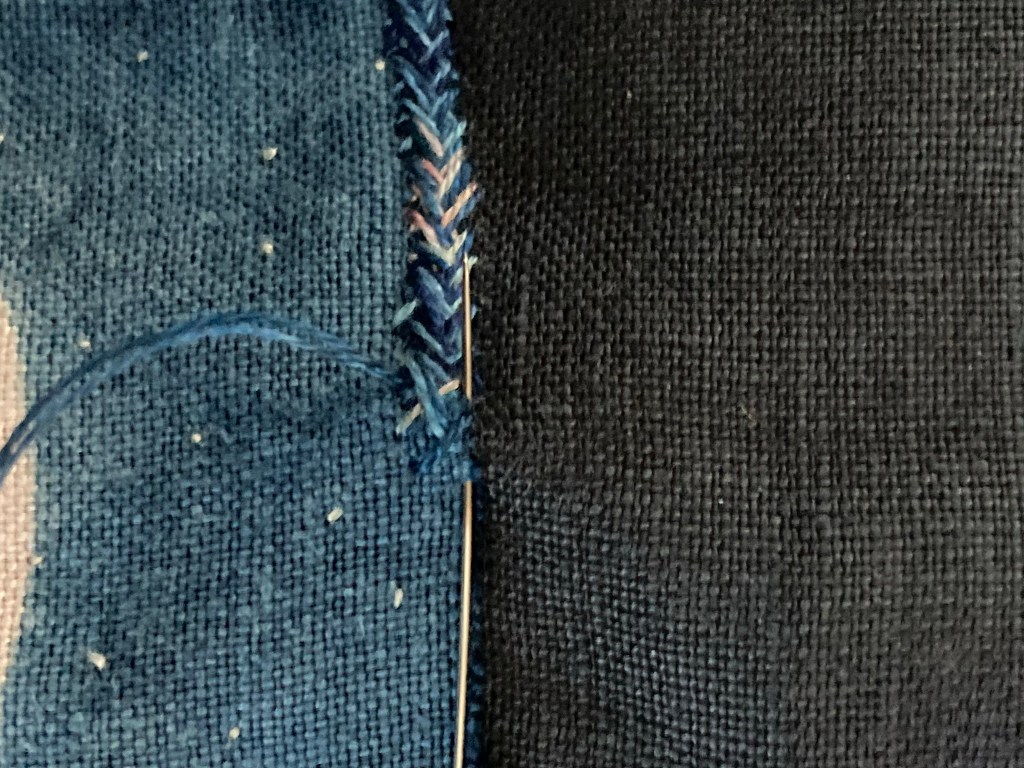
And yes, those are the same photos as before, just rotated 45 degrees to make the point that the stitching motion remains the same whether you work horizontally or vertically (I do both).
Phew … hope that helps. I do wish I had a set-up for doing video, which might have made things clearer, but I’m not ready for prime time 😉
On a lighter note, I had to laugh when I got an email from a local boutique showing the “latest” in denim fashion … looks like every pair of jeans I’ve owned for the past 50 years … with the exception of the holes in the knees, which I tend to patch, and the hems, which are usually just frayed at the heels …

Last for today, here’s an intriguing thing that I read about somewhere and then searched online …


It’s a subscription service (pricey at $33 a month) where you’re given a mechanized bin for discarding food waste (veggie and fruit trimmings, egg shells, food scraps, even chicken and fish bones). The device runs at night, dehydrating and crushing the food into a dry meal of sorts. There’s a charcoal filter to eliminate odors, which is recyclable and replaced periodically as part of the service. When the bin is full (every 3-4 weeks) you empty it into a resealable bag, box it up in a prepaid mailer, and give it to USPS to deliver to the mother ship. From there, the plan is to convert it to chicken feed … something they’re still “working on.”
You can read more about it here … and no, I’m not going to subscribe in advance, but for sure I’ll keep an eye out for news on how it works once it goes live.

Gosh Liz, thank you for such a complete tutorial!! The close-up photos really show it off and show the beauty of your thread choice. I’ve saved this post aside so I can give it a go 🙂 Thanks!
Those jeans…yeah, for sure. We always laugh at the pre-worn jeans and guitars! Oy.
I always wonder – when folks are trying to come up with things to help the planet…things like, how god is that charcoal for the planet…what about the Bagging and Boxing and Shipping??? My goodness it is complicated.
LikeLike
gotta love Deb Lacativa’s magic threads … using one strand each from two different lots
and yeah, I’m thinking I can get a deluxe compost spinner for far less …
LikeLike
Thanks for the pictures and and step by step instructions. I’ll try this stitch!
LikeLike
it’s such a fun stitch to do since the needle is always heading in the same direction … but it eats thread at a wicked pace … about 1.5″ to an arm-length
LikeLike
I was going to recommend Sharon b’s Pintangle Stitch Dictionary, but your pictures are as clear as hers are. She and Mary Corbet are my go-to online teachers.
A good compost bin probably works as well as the mill and you can add other things to a compost. Besides which you’d get to use the compost. (I like my spin bin.) The dehydration ability might be useful sometime here in the rainy PNW.
LikeLike
I knew about the pintangle dictionary, but Mary Corbet is new to me … thanks for the lead
and yes, I’m thinking a good compost bin is in my future … I’ve been spoiled in the past by having large enough properties that having rodent visitors to the compost pile hasn’t affected us … here there is so little land that I worry about attracting rats (and by extension, the snakes that eat them) …
LikeLike
That’s a beautiful edging stitch!
LikeLike
Thanks Karen … I’m surprised by not finding it anywhere … would love to know if you have encountered it, perhaps under a different name?
LikeLike
It looks similar to what I know as close herringbone stitch, but you do it much better 🙂
LikeLike
I blush … thank you
LikeLiked by 1 person
It’s amazing how many ‘entrepreneurs’ are trying to make money from reinventing the wheel. I’m another who’s always laughed at the worn out jeans thing and here we’re lucky to have compost bins. If not for the compost then there is the brown bin which the council will take away with food waste in for composting on a huge scale. Sadly they dont allow the swill bin collections anymore which were collected for the local pig farms.
LikeLike
Thanks Liz for showing us the way. I was wondering the same thing Nancy was. I also really like how you doubled the thread to get some lovely values of blue plus a pop of color.
LikeLike
I think Deb L calls it “heathering” where you take two strands of her floss and reverse the direction of one relative to the other to further blend the colors
LikeLike
Fabulous lesson Liz – thanks!
LikeLike
you’re welcome … hope it comes in handy some day
LikeLike